Table of Contents
Open Table of Contents
fpga 加速手写体识别
1 理论准备
1.1 数据
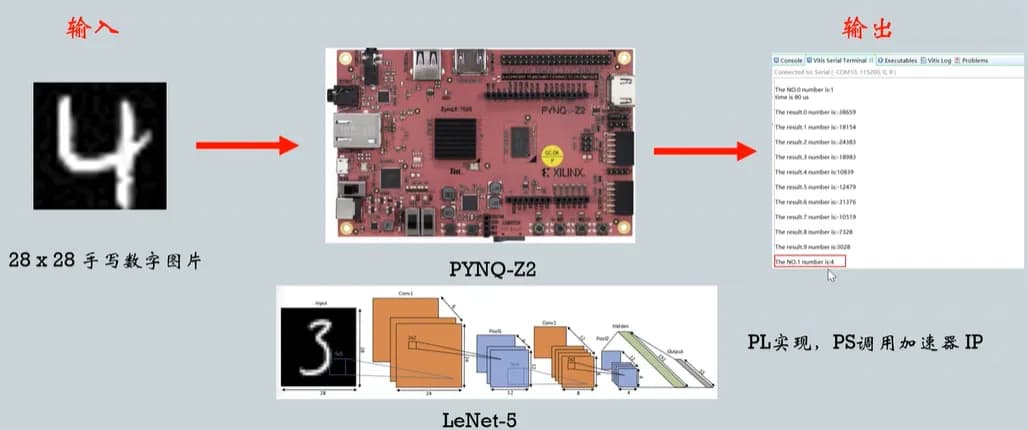
数据准备:28 * 28 手写体图片(LeNet-5: MNIST)
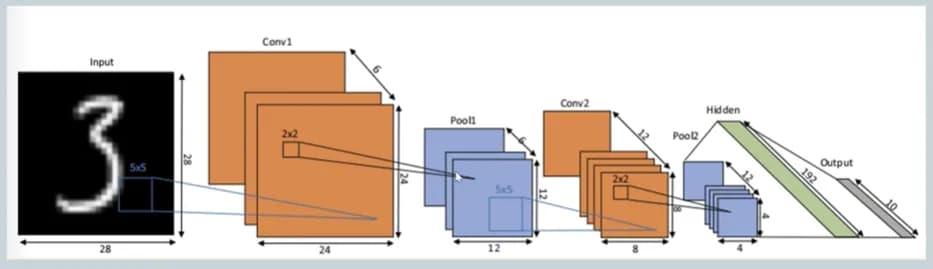
| Size | Channel | Layer |
|---|---|---|
| 28 | 1 | Conv5 |
| 24 | 6 | Pool2 |
| 12 | 6 | Conv5 |
| 8 | 12 | Pool2 |
| 4 | 12 | FC |
| 192 | 1 | Sel10 |
| 10 | 1 | End |
1.2 模型量化
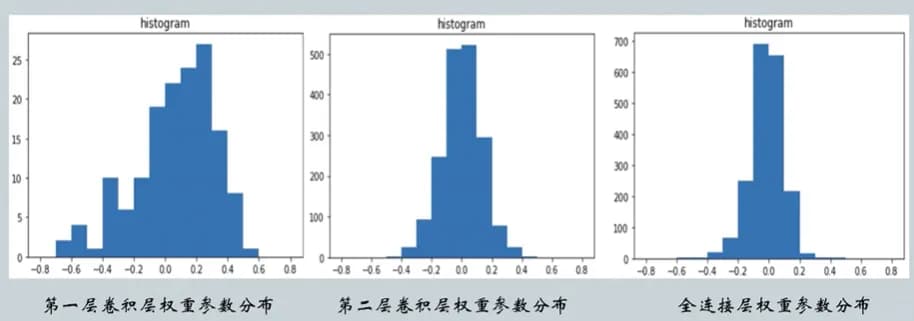
INT8量化将每层权重映射到-127~+127之间,MAX-MAX映射将损失精度,先观察参数分布情况再选择映射方法:
1.3 硬件加速器架构
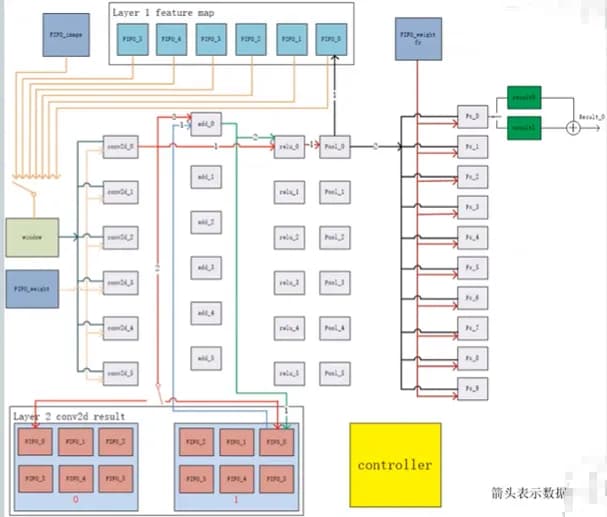
- 卷积部分并行度为6(由第一个卷积层通道数决定);
- 整个网络分为13次卷积循环(将第一层卷积
5*5*6*1作为一次循环,第二层卷积5*5*12*6则有十二次); - 权重参数为
3870=5*5*6*13+10*192个参数不多,直接存储在BRAM,图片统一存储在SD卡内,通过DMA读取,传输到PL端的FIFO中,供加速器使用; - 全连接层没有复用(空间换时间)。
1.4 顶层架构(PS+PL)
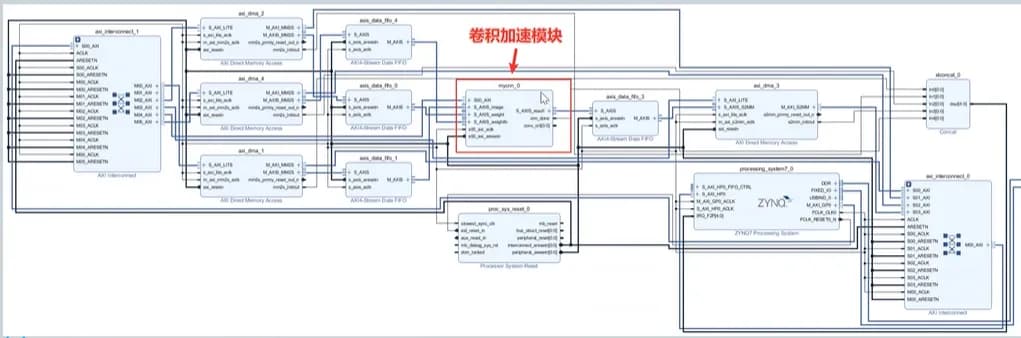
将卷积硬件加速器打包成IP,在Block Design中进行连接:
- 通过三个S_AXIS接口从FIFO中接收图像像素数据、卷积层权重参数和全连接层权重参数。神经网络模型全部参数由DDR一次性全部传输到FIFO中;
- PS端通过AXI-Lite接口写内部寄存器来控制卷积加速模块,接收到PL端FIFO通过DMA传来的10个32bit数据时,即一次卷积加速任务完成。卷积加速模块返回初始状态,但不释放缓存的1920个全连接层权重参数,等待PS端发出控制幸好开始下次加速任务。
1.5 总览
2 滑窗模块设计
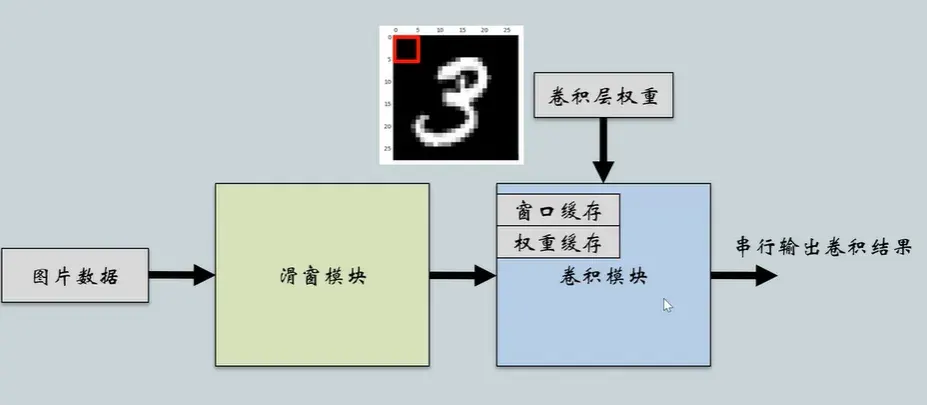
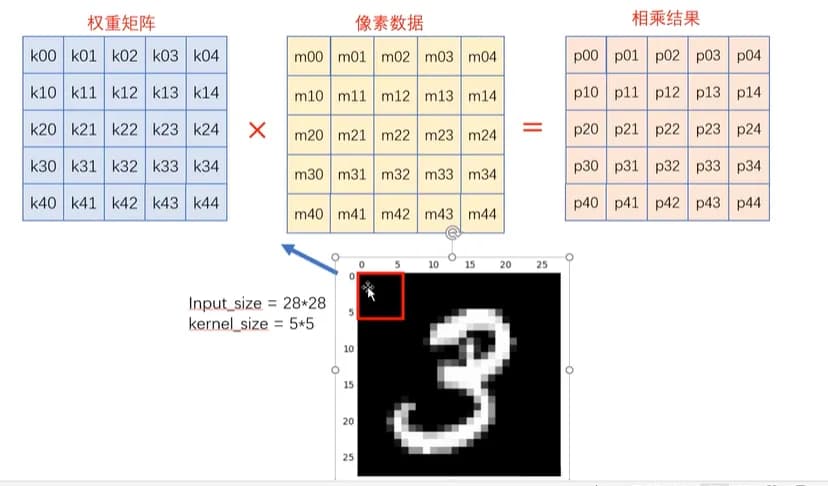
滑窗是卷积的基本结构:
2.1 设计思路
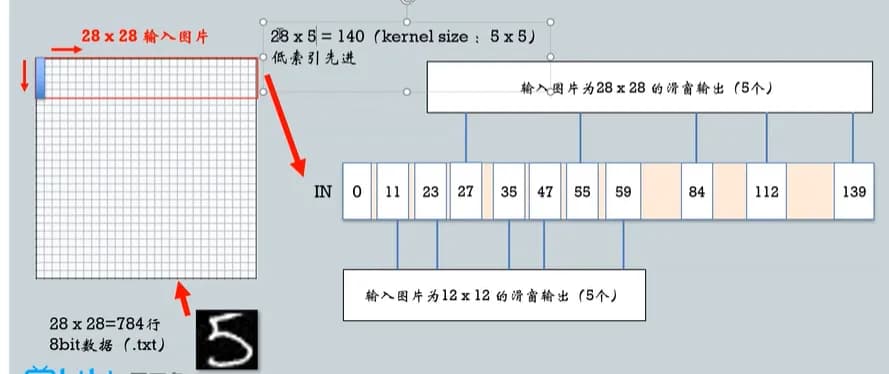
移位RAM:
2.2 设计实现
加速器模块:
// 滑窗法:滑窗读取数据
// 用于给卷积模块剔红输入数据
module window(
    input   clk,
    input   rst_n,
    input   start,
    input   state,
    input   [7:0] data_in,
    output  [39:0] taps_out
);

    integer i;
    reg [7:0] mem [0:139];

    // 串行存储 140 个数据
    // 140 = 28 * 5
    // 每个上升沿由低位向高位移位一次
    always @(posedge clk or negedge rst_n) begin
        if(start) begin
            mem[0] <= data_in;
            for(i = 1; i < 139; i = i + 1)
                mem[i + 1] <= mem[i];
        end
    end

    // state = 0 时:处理 28*28
    // state = 1 时:处理 12*12
    assign taps_out = (!state)?{mem[139],mem[111],mem[83],mem[55],mem[27]}:{mem[59],mem[47],mem[35],mem[23],mem[11]};

endmodule
TestBench:
module window_tb();
    // 输入
    reg clk;
    reg rst_n;
    reg start_window;
    reg state;
    reg [7:0] img_in;
    // 输出
    wire [39:0] taps;

    // 文件指针
    integer fp_i;
    integer count_w;

    // 读入行数计数
    reg[10:0] cnt_line;

    // 滑窗例化
    window window_inst(
        .clk        (clk),
        .rst_n      (rst_n),
        .start      (start_window),
        .state      (state),
        .data_in    (img_in),
        .taps_out   (taps)
    );

    // 读取图片数据
    initial begin
        fp_i = $fopen("image.txt","r");
    end

    // 初始信号
    initial begin
        cnt_line = 0;
        clk = 0;
        start_window = 0;
        state = 0;
        # 20;
        start_window = 1;
    end

    // 一共784=28*28行:一行为一个像素的Hex颜色值
    always @(posedge clk) begin
        count_w <= $fscanf(fp_i,"%b\n",img_in);
        cnt_line <= cnt_line + 1;
        if(cnt_line == 784) $display("picture read over");
        $display("%d, %b", count_w, img_in);
    end

    // 时钟信号
    always #10 clk = ~clk;

endmodule
3 卷积模块设计
3.1 设计思路
七级流水线pipline:计算 -> 合并
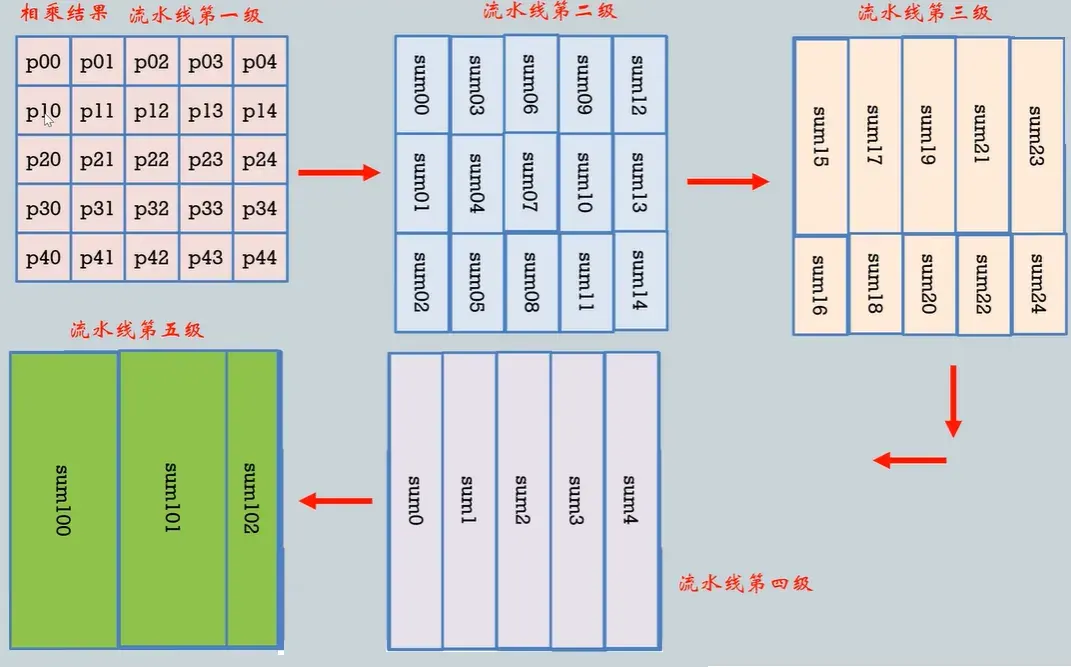
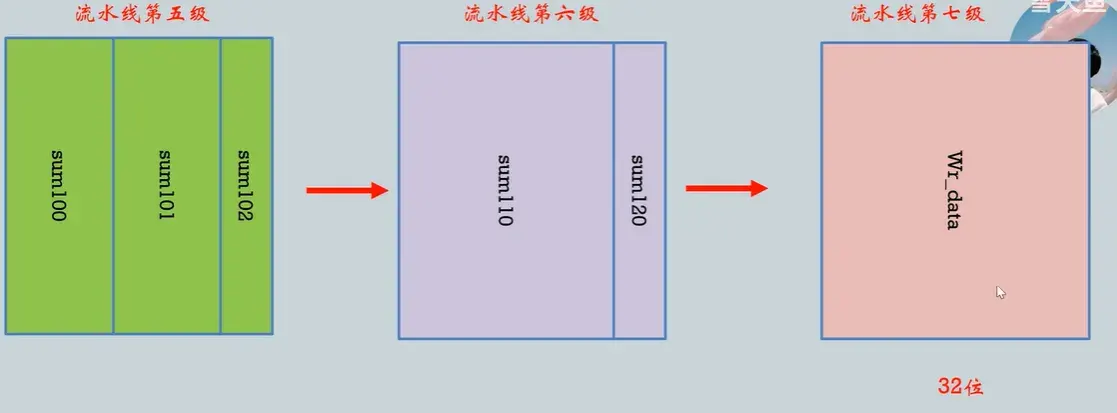
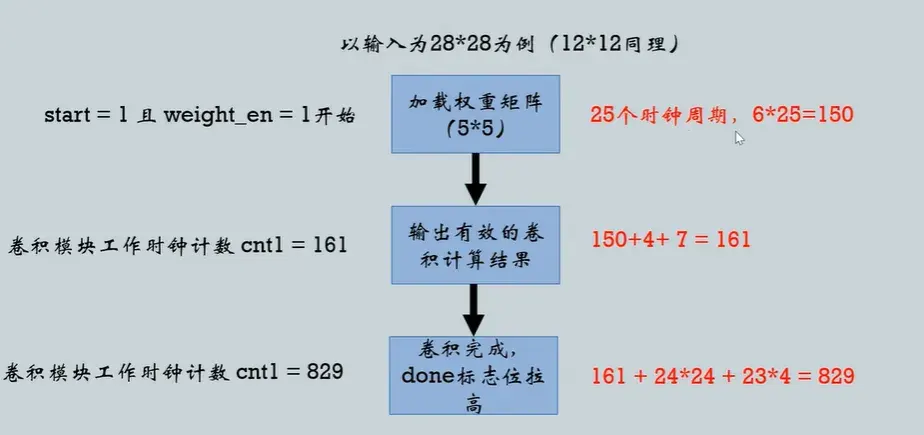
执行流程:
例化: